So you’ve decided you want to sleep under canvas with a real bed and a proper bathroom nearby. The only problem? When you start to choose a glamping site, you’re suddenly faced with safari tents, glass domes, yurts, cabins and trailers, all promising “luxury camping” at wildly different prices. Some sites look stunning in photos but turn out to be a 40-minute walk from the nearest toilet, and by the time you notice, you’ve already paid a deposit.
This practical checklist takes the guesswork out of the process. We’ll walk through how to decide your glamping style and comfort level, pick the right season and location, set a realistic budget before you browse, check facilities and heating, read reviews and vet the operator, and book at the right time with all the details confirmed. By the end, you’ll have a clear way to compare any two sites side by side — and a handy summary checklist to keep open in a second tab while you search.
Decide Your Glamping Style and Comfort Level
The first decision shapes everything else: what kind of structure do you actually want to sleep in? A safari tent, a geodesic dome, a yurt, a solid cabin and an Airstream-style trailer offer very different experiences, even at similar price points. Safari tents usually give you the most space and a classic canvas feel, domes win on stargazing through clear panels, yurts feel cozy and round with a central atmosphere, cabins are the closest to a small house, and trailers bring a retro road-trip vibe with less floor space.
Before you fall in love with a photo, set your comfort baseline. Decide in advance what you genuinely need — a real bed, a private bathroom, a kitchenette — and what you’re happy to share. Two sites can both call themselves “luxury” while one has an en-suite bathroom and the other has a communal shower block a short walk away. That single difference changes the whole feel of a stay, especially in cooler or wetter weather.
- Safari tents: typically the roomiest option, often with separate sleeping and living areas, so they handle families and longer stays well.
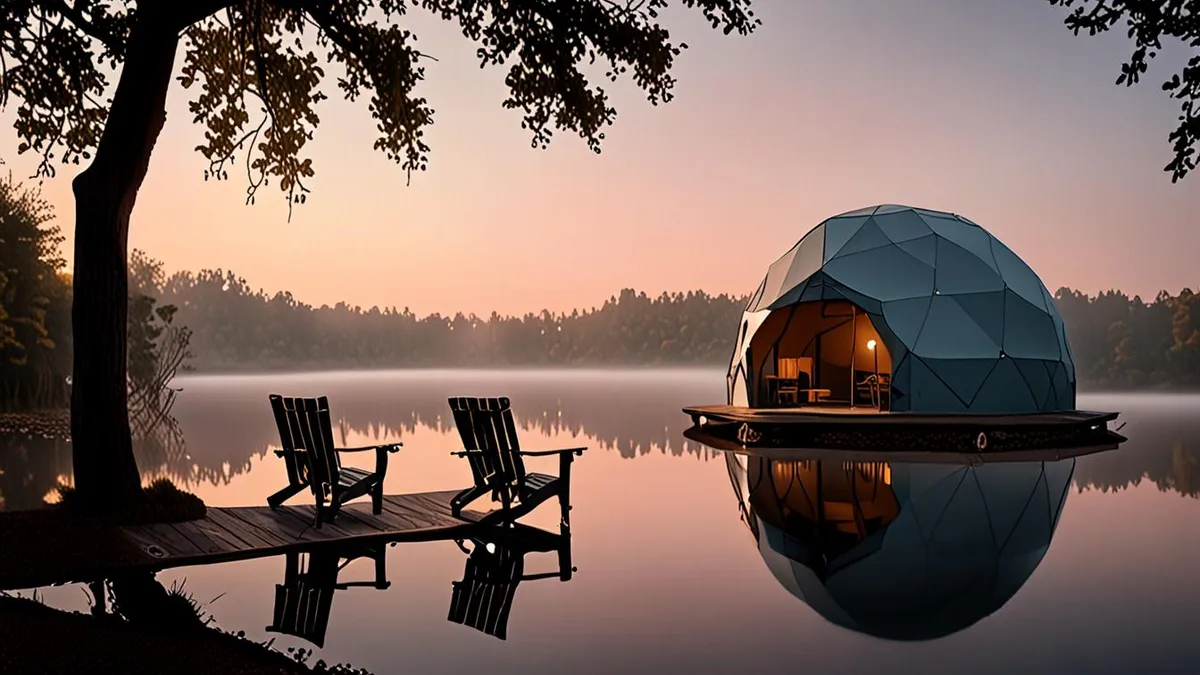
- Geodesic domes: compact but dramatic, frequently with panoramic windows or skylights — ideal when the view is the main attraction.
- Yurts: round, insulated structures with a warm, snug interior; a good middle ground between canvas and solid walls.
- Cabins: solid construction means better soundproofing and weather protection, plus they usually feel most like a small rental home.
- Airstream-style trailers: a fixed, compact footprint with retro charm; best for one or two travelers who don’t mind tighter quarters.
Finally, match the style to your group. Couples tend to suit domes and smaller yurts, where the cozy scale is part of the charm. Families generally need multi-room tents or cabins, so kids can sleep separately and you’re not all tripping over each other at bedtime. Groups of friends often do best with a cluster of smaller units rather than one large shared space.
Pick the Right Season and Location
Once you know what you want to sleep in, work out when and where. In most temperate regions, the peak glamping season runs from May to September, and for good reason: you get the most reliable weather, long evenings around the fire, and sites running at full capacity with all facilities open. If your dates are flexible, this window is the safest bet for a first glamping trip.
Consider the shoulder months
If you’d rather save money and share the site with fewer people, look at April or October. Shoulder-season rates often run 20-30% below peak prices, and popular sites that book out months ahead in summer can have real availability in these months. The trade-off is cooler nights and a higher chance of rain, so this works best if you’ve confirmed heating and solid weather protection — which we’ll cover in a later section. Some coastal destinations also shine in the quieter months; for inspiration on off-season seaside trips, read our guide to celebrating New Year in Belgium’s coastal towns.
Location and landscape
Next, think about practicality. A site within a 30-60 minute drive of shops or a town makes a huge difference: you can restock groceries, grab a forgotten item, and have somewhere to go if the weather turns for a full day. Remote sites look romantic on a map, but a week of rain with no nearby options tests any traveler’s patience.
Finally, choose the landscape type you actually want. A lakeside site gives you swimming and paddling from your tent door, forest sites offer shade and that classic woodland atmosphere, coastal spots bring sea air and big skies, and mountain locations deliver views at the cost of cooler temperatures. Picture what you’ll see when you unzip the door in the morning — that’s the decision you’re really making.
Set a Realistic Budget Before You Browse
Glamping prices vary enormously, so set your budget before you start browsing — otherwise every listing starts to look reasonable. As a general guide, mid-range glamping tents typically cost $120-$250 per night, while luxury domes and lodges typically cost $250-$500 per night. Treat anything outside those ranges with a closer look: a bargain price often signals shared facilities or a basic setup, while a premium price should come with premium comfort you can verify in the listing.
The nightly rate is only the starting point, though. Many sites charge separately for extras that can add a meaningful amount to your total, and some only reveal them at checkout. When you compare two sites, always compare the final cost for your exact dates, not the headline nightly rate.
- Firewood bundles: many sites sell these on-site or expect you to bring your own; over a multi-night stay the cost adds up, so check what’s included.
- Activities: kayaking, guided walks or farm experiences are often bookable at an extra charge — decide in advance which ones you’ll actually use.
- Cleaning fees: some operators add a flat cleaning or service fee per stay, which hits one- and two-night bookings proportionally hardest.
- Minimum stays: a minimum 2-night stay is common on weekends at many sites, so a “cheap” nightly rate can mean a much bigger total than you planned.
One practical trick: build a simple comparison with the total price for your stay, including extras and any minimum-stay requirement. A site at the top of your range with everything included often beats a cheaper-looking option once the add-ons are counted. And remember that shoulder-season dates frequently bring the same facilities at a noticeably lower total, which is one of the easiest savings in glamping.
Check Facilities, Heating and Weather Protection
The bathroom situation is the single biggest comfort divider in glamping. An en-suite bathroom with a flush toilet and hot shower feels close to a hotel stay, while a private bathroom block a short walk away is a step down but still comfortable. Fully shared facilities, shared with strangers at peak times, change the whole character of the trip, so ask exactly which setup your unit has before you book.
Heating matters just as much if you are traveling outside the summer months. Year-round sites should offer heating such as wood stoves or electric heaters, and a wood stove in a canvas tent on a chilly night is genuinely cozy. Ask whether firewood is included, sold on site, or something you need to bring yourself, because a cold first night is a common complaint in reviews.
Weather protection and cooking
Canvas and dome structures vary widely in quality, so quiz the operator on the build. Ask about insulation, waterproofing, and whether the tent or dome is rated to handle wind and rain rather than only fair-weather use. A well-made structure with a solid platform and covered porch will feel completely different from a cheap tent in a storm.
Finally, check how you will eat. Options typically range from a full kitchenette in the unit, to a communal kitchen shared with other guests, to nothing more than a BBQ and a cooler. Match the setup to your plans: a full kitchenette suits longer stays and families, while BBQ-only is fine if you plan to eat out in nearby towns most evenings.
Read Reviews and Vet the Operator
Reviews are where glamping sites reveal their true quality, because photos and descriptions rarely show the whole picture. Focus on the most recent reviews first, since a change of management or a few seasons of wear can transform a site. Pay special attention to repeated mentions of cleanliness, noise from neighboring units or nearby roads, and whether guests felt the photos matched reality.
Before booking, message the host with a specific question, such as what the heating setup is or whether the bathroom is en-suite. How quickly and how helpfully they reply tells you a lot about what support you will get if something goes wrong during your stay. A host who answers within a day with clear, specific details is a good sign; vague or slow responses are a warning.
Never pay a deposit until the cancellation and refund terms are in writing. A short email summarizing what you agreed counts, as long as it is clear and dated.
- Weather-related cancellations: ask whether storms or severe forecasts trigger any refund or rebooking option, since policies differ widely between operators.
- Deposit versus full payment: check whether you pay a small deposit up front with the balance later, which gives you a cheaper exit if plans change.
- Response window in writing: ask the host to confirm in writing how many days before check-in you can cancel and still receive a partial refund.
- Platform versus direct booking: note that booking through a rental platform often gives you different protection than paying the operator directly, so compare both routes.
Book at the Right Time and Confirm the Details
Good glamping sites at popular destinations often have only a handful of units, so availability disappears fast for the dates everyone wants. A single small property might have six or eight tents in total, which means a few family reunions or a rainy-weather rescheduling can wipe out an entire summer weekend. Timing your booking right, and confirming the small details before you pay, saves both money and disappointment. Work through the steps below in order, and keep notes as you go so nothing gets lost in email threads.
- Book early for peak dates. For summer weekends, book popular sites 3-6 months ahead. Midweek dates and shoulder-season stays give you more flexibility if you decide later.
- Confirm check-in and check-out times. Ask when you can arrive and when you must leave, and whether late arrival is possible if your drive runs long, since some sites lock gates or turn off reception at night.
- Check parking and access. Ask whether you park next to your unit or in a lot and walk your bags in, and whether the access road suits your vehicle.
- Clarify the pet policy. If you are bringing a dog, confirm it is allowed, whether there is an extra charge, and if pets are restricted to certain units or areas.
- Get the inclusions in writing. Ask exactly what the rate covers: linens, towels, firewood, kitchen equipment and activities are not always included.
- Request a packing list. Ask the host what you should bring, because bedding, towels and lanterns are not always provided, and a headlamp and warm layers are easy to forget.
Once everything is confirmed, save the written summary of inclusions and policies with your booking confirmation. A screenshot of the listing description works well too, since listings occasionally change between booking and arrival. If anything differs from what you expected when you get there, you will have something concrete to point to, which makes resolving problems far easier than arguing from memory. It also helps if you are traveling with a group: share the summary with everyone so nobody arrives expecting towels or a stocked kitchen that was never part of the deal.
Your Glamping Site Checklist at a Glance
Glamping sites vary wildly, and comparing them without a system is how travelers end up overpaying for a soggy tent with no bathroom. The fix is simple: match the stay type and comfort level to your group, with a nightly budget of roughly $120-$500 depending on how much luxury you want.
Choose your season first, since it shapes both price and experience: May to September gives you the most reliable weather in temperate regions, while April and October often bring savings of 20-30% and quieter sites. Before you pay any deposit, verify the essentials — heating for cooler months, bathroom setup, recent reviews, and clear cancellation terms in writing. Work through those checks in order and you’ll book with confidence instead of guesswork. If this checklist helped you plan your trip, leave a comment or share the article with a fellow traveler.